Monday, September 23, 2013
Sailing
Sunday I was out sailing with my regular crew Vegar and two new potential crew members, eager to learn sailing. We were crossing the fjord a couple of times. We had a GoPro on the float deck, the result can be seen here
Wednesday, September 18, 2013
On the water. Brief update.
While waiting for the epoxy to cure, I started to make the main hull ready. Beams back on.

Jib furler line in Silas' new fairlead

Daggerboard control line cleat blocked up with a piece of UHMWPE.

Engine bolted to the new engine bracket.

Everything while the epoxy skimming coat was curing

And then the two coats of primer


With great help from good friends we were able to put the boat together again on Thursday night August 22


During Friday night and the small hours of Saturday, the boat was launched and most of the necessary equipment was refitted. I was pushing hard these days as the annual local distance race "Ytterøya rundt" started in the morning of Saturday August 24. Still the largest race in our part of the country, although have been suffering very light conditions over the last few years. Last year we were the only boat to finish the course. This year 43 boats participated, of which only 3 boats reached the first rounding due to the glassy conditions, most of the time no detectable movement in the air at all, but half a knot of favourable current. I ended about 100m from the mark when the race was called off. A beautiful day though, just like summer in fact.

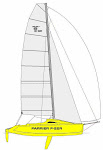
Ytterøya rundt Aug 24 2013
Saturday, August 17, 2013
Almost there
After round one: filling the lows, cheese grating was due, and then: The big fill. I have experienced that adding enough filler to avoid having to re fill low areas saves a lot of work. A bit more sanding, but if you make your compound light and use fresh paper on the torture board it is not that bad. Several re fillings however can be bad due to different hardness etc leading to new lows etc etc, you get the picture. However, I have not yet been able to add enough in the big fill to get there. But better all the time. Filling and fairing looking in different angles at different stages


Monday, August 12, 2013
Planning for a scientific experiment
I decided a couple of weeks ago, that if I were to hit the water before the snow starts to fall around here, there were no way I could finish the work I have started. The upside is, that when I add one modified and one original float to the boat, I will effectively be able to tell the difference, if notable. I am also capable to record various data, such as roll and pitch, from my Nexus system.
I had my share of sudden decelerations when the float was "submarining" and the flat deck acted as a break last season, once I was solo I was very close to be thrown over board actually. To make these stops a bit softer I am adding 40mm foam to the front deck.

Rounding it off to the best of my ability

And filling the transition to the original hull with epoxy/micro-balloons

Laminating, using a 300gsm 2x2 twill carbon fabric. Conservatively wetted out and vacuum to make sure no bubble trouble
.

The port float had several cracks from the storm last fall. I turned out, however, that the hybrid lay up I used is very durable. Except for two places, the cracking was only in the fairting compound, and the laminate was only dented. No internal delamination either. I just sanded with my pressured air angle grinder at 22000 rpm and coarse disc until kevlar fibres were lifting from the bottom of the site. Then laminating over with 300gsm carbon. Vacuum.


Filling the dents


Round one: Filling the lows

Wednesday, July 24, 2013
The "new" float is getting there, slowly. The first, starboard, side was a bit of work, but I think it starts looking reasonable. Port side was a blast and the next two float sides should be even faster, as I can apply the extra foam more precise.
I have removed the SS deck fitting for the bow pole side stay and replaced it with a piece of carbon tubing taped to the forward bulkhead. I will use a system similar to the one on the shrouds to attach the stays.


I have removed the SS deck fitting for the bow pole side stay and replaced it with a piece of carbon tubing taped to the forward bulkhead. I will use a system similar to the one on the shrouds to attach the stays.

More sheets of 12mm H60 foam being glued to the central 75mm foam bow cap piece

Another sheet being glued to the float side

Bow cap being attached

The carbon tube is taped to the forward bulkhead

Float up side down. Elongated at waterline, but the shape is preserved at the first few inches of immersion to maintain the good light air performance.

Port side up side down. Will give an idea as to how the additional buoyancy is distributed. Much less fairing compound will be required prior to lamination here.

Front view up side up. I plan on adding a rounded deck the first 152 cm of the float to assist in the resurfacing process after the occational dive, and to reduce the rate of deceleration encountered with the current design.

Oblique view

Prototype padding. Lots of bits and pieces of foam and a bunch of fairing compound. This shape is transferred to the other sides using templates every foot cut from this shape.
Saturday, July 06, 2013
Establishing the new forward float shape
I have an idea of how the shape at the first bulkhead should be. And the new profile of the float bow. Then I just have to try and tie it all together and apply the adjustments listed in my last post. I am still uncertain as to how well this will go, both with respect to the final result as well as how much trouble it will be to make these changes.
This morning i started out glueing a 12mm sheet of foam to the next 1,2 metres aft of the first bulkhead.. I use PU glue for all the foam glueing. I put this sheet in a bag to make sure I had sufficient pressure over the whole panel while curing. The foam blank in progress seen in foreground.

I was home waiting for the cure when Per, who has been working in my workshop, building a new carbon wing mast for his cruising cat, called me and told of a gigantic bang that suddenly had frightened him. It turned out the resin trap had imploded. Saved the job by bypassing the trap.

After rough shaping the new foam I glued another sheet in the more forward part.

I think I will have to attach the foam blank now, and just work the long board to get the lines smooth. Then probably make up patterns to transfer the same shape to the three other float bow sides.
Friday, July 05, 2013
Re start
With a few other non sailing related tasks finished, it is time to push on getting the boat back on the water. This coincided with the arrival of Farrier Marines very nice set of float lifting foil cases as shown in the below picture.

I've spent much of the day glueing foam to the bow blank, and shaping it to the best of my abilities. The aims are as close to the original as possible down low, to maintain light air performance, then as fat as possible in the mid section to prevent bow buying as the wind picks up, and then a fine entry rounded top to easily resurface when the above occurs anyway. It's a "start fat enough and take down a bit more right here until you are satisfied" project.Not easily photographed.
I made a heavy duty carbon tube to replace the SS fittings for the bow pole whisker stay. It will be glued to the forward bulkhead, transversing the float and using a system as in my shroud attachments.

And I finally finished the taping of the wing net support flange modifications.

I'm looking forward to receive Mr. Farriers details on the correct placement of the lifting foils, but not so much looking forward to all the hassle installing the cases. Stay tuned.
Monday, June 17, 2013

Back in the workshop
No available time nor energy for a while, but I am finally back in the workshop and will push on to get the boat on the water in time for our local event late August.
I will close off the water ballast tank with a sheet of plexi. Will facilitate inspection, to learn if the system works.

Stairs painted and finshed. I also choosed to paint the main bulkhead inside. I use a cheap two part polyurethane paint. No preparations other than removing the peel ply and a quick sand.

Water. I use a 10 litre removable plastic tank with a tap. Sits on a shelf in the backrest, and will be secured with a webbing. Extra water can be carried in another 10 litre can under bunk next to daggerboard case.


Yesterday I started to glue the "mousefur". Starboard settee back covered. Suddenly the feel of the interior shifted from workshop to a cruising multihull.

Today I worked on the port side "mouse fur". I use a water based wall glue, it is supposed to be adapted for a lot of difficult materials, time will show how it keeps up. First, glue spread out with a trowel with 2mm fine grooves.

Mouse fur attached after about one hour of pre drying time. I didn't bother to remove the switches and stuff from the electrical panel when painting, so will have to do this later. I made a removable table for the lap top next to the electrical panel. I am able to log all data from the Nexus system, and the plan is to use these data to make a polar diagram.

Starting to look like a boat interior. I am still to decide on storage solutions for the area in front of the front beam bulkhead, and this will not be finished further for now. Would be nice to have some cushions made though.

And the ceiling. Not looking forward to this, but will certainly be important to make it a bit cosier. Will see if this is done now or postponed to a later time. I am thinking of making some hand rails, and it would probably be wise to get the "mouse fur" in before those are mounted.

Subscribe to:
Posts (Atom)